pillsbury hot roll mix instructions
Pillsbury Hot Roll Mix Instructions: A Comprehensive Guide
Pillsbury’s versatile Hot Roll Mix offers a delightful foundation for both savory dinner rolls and sweet cinnamon rolls, simplifying baking for all skill levels!
This guide provides detailed instructions, variations, and troubleshooting tips to ensure perfect results every time, enhancing your culinary experience․
Understanding the Mix
Pillsbury Hot Roll Mix is a convenient pre-packaged blend designed to effortlessly create homemade rolls․ It’s a popular choice for bakers of all levels, offering a time-saving alternative to measuring individual ingredients․ The mix contains a precise balance of all-purpose flour, granulated sugar, instant nonfat dry milk (or powdered milk), salt, and dry yeast granules – the essential components for a successful dough․
Understanding the role of each ingredient is key․ Flour provides structure, sugar feeds the yeast and adds sweetness, milk contributes to tenderness and browning, salt enhances flavor, and yeast is the leavening agent responsible for the rise․ The mix is formulated to deliver consistently soft and fluffy rolls, whether enjoyed as a simple dinner accompaniment or transformed into decadent cinnamon rolls․ It’s a versatile base for culinary creativity!
Many users have successfully replicated the Pillsbury experience using unbleached all-purpose flour in homemade versions of the mix, demonstrating its adaptable nature․
What is Pillsbury Hot Roll Mix?
Pillsbury Hot Roll Mix is a pantry staple celebrated for its ability to quickly and easily produce warm, buttery rolls․ It’s a pre-blended combination of dry ingredients specifically formulated to deliver consistently delicious results with minimal effort․ This mix isn’t just for dinner rolls; it’s incredibly versatile, serving as the foundation for sweet treats like cinnamon rolls and even creative filled variations․
Essentially, it’s a shortcut to homemade goodness, eliminating the need to measure out individual components like flour, sugar, and yeast․ Simply adding water and butter (or oil) initiates the process, transforming the dry mix into a pliable dough․ The resulting rolls are known for their soft texture and comforting flavor, making them a perfect addition to any meal or occasion․
Pillsbury encourages home baking with this convenient product, offering a delightful experience for both novice and experienced bakers alike!
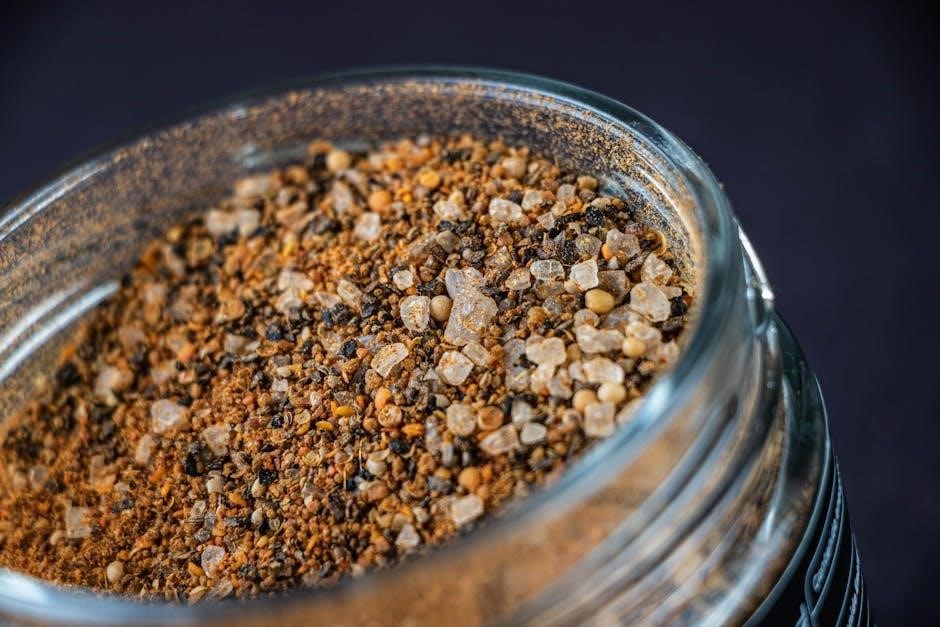
Key Ingredients in the Mix
Pillsbury Hot Roll Mix achieves its signature flavor and texture through a carefully balanced blend of ingredients․ All-purpose flour, often unbleached, forms the base, providing structure to the rolls․ Granulated sugar contributes sweetness and aids in yeast activation․ Instant nonfat dry milk (or powdered milk) enhances the dough’s softness and richness, while also improving browning․

Crucially, the mix contains dry yeast granules, the leavening agent responsible for the rolls’ rise․ Salt balances the sweetness and enhances the overall flavor profile․ The inclusion of these components simplifies the baking process, offering convenience without compromising quality․
While the exact proportions are proprietary, these core ingredients work synergistically to create a reliable and delicious base for both savory and sweet roll creations, making it a versatile pantry staple․
Basic Dinner Roll Instructions
Creating classic dinner rolls with Pillsbury Hot Roll Mix is remarkably straightforward․ Begin by emptying the entire contents of the mix into a large bowl․ Add the required amount of warm water – typically around 1 ¼ cups – and mix until a soft dough forms․ Knead the dough on a lightly floured surface for approximately 5-7 minutes, until it becomes smooth and elastic․
Place the dough in a greased bowl, turning to coat․ Cover and let rise in a warm place for about one hour, or until doubled in size․ This first rise is crucial for developing flavor and texture․ Punch down the dough gently and proceed to shape into desired roll sizes․
Place the shaped rolls onto a greased baking sheet, cover, and allow for a second rise before baking at 350°F (175°C) for 12-15 minutes, or until golden brown․
Yield and Preparation Time
Using one package of Pillsbury Hot Roll Mix, you can expect to yield approximately 24 standard-sized dinner rolls․ This quantity is generally sufficient for a family meal or a small gathering․ However, the yield can be adjusted slightly depending on the size of the rolls you choose to create – smaller rolls will naturally result in a higher quantity․
The total preparation time, from start to finish, typically ranges between 1 hour and 1 hour and 30 minutes․ This includes the initial mixing and kneading, the two required rising periods, and the final baking time․
Allow approximately 15-20 minutes for active preparation, with the remaining time dedicated to the rising process․ Remember that these are estimates, and actual time may vary based on environmental factors like room temperature․
Required Equipment
To successfully prepare Pillsbury Hot Roll Mix, you’ll need a few essential pieces of kitchen equipment․ A large mixing bowl is crucial for combining the ingredients and allowing the dough to rise․ A liquid measuring cup and dry measuring cups/spoons ensure accurate ingredient proportions, vital for optimal results․
A wooden spoon or a stand mixer with a dough hook facilitates thorough mixing․ A clean kitchen towel is necessary for covering the dough during the rising stages, maintaining warmth and moisture․ A 9×13 inch baking pan is standard for dinner rolls, though a muffin tin can be used for individual portions․
For cinnamon rolls, a rolling pin is essential for spreading the filling․ Finally, an oven thermometer guarantees accurate baking temperature, preventing over or undercooked rolls․

Step-by-Step Dinner Roll Baking Guide
Embarking on baking delightful dinner rolls with Pillsbury Hot Roll Mix is straightforward! Begin by gathering your ingredients and equipment․ In a large bowl, combine the mix with the required water and melted butter, mixing until a soft dough forms․ Allow the dough to rest, initiating the first rise – approximately one hour, or until doubled in size․
Gently punch down the dough and divide it into equal portions, shaping each into a round roll․ Arrange the rolls in a greased 9×13 inch baking pan․ Cover and let rise again for about 30 minutes․ Preheat your oven to 350°F (175°C)․
Finally, bake for 15-20 minutes, or until golden brown․ Let cool slightly before serving these warm, buttery accompaniments to any meal!
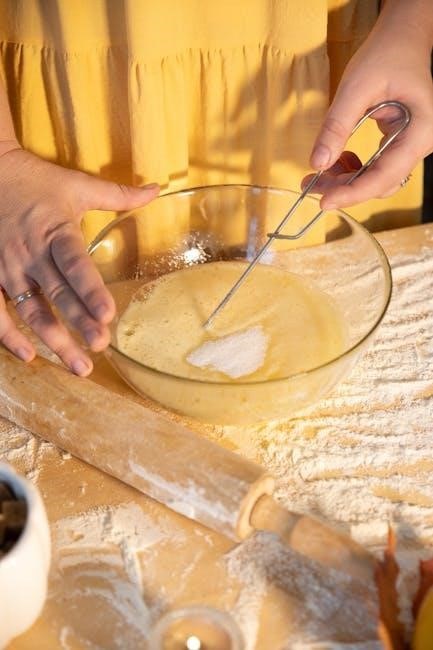
Mixing the Dough
The initial step in crafting perfect rolls involves skillfully mixing the dough․ Begin by emptying one package of Pillsbury Hot Roll Mix into a generously sized baking bowl․ Add the required amount of water – typically around 2/3 cup – and 1/4 cup of melted butter․ These proportions ensure a soft, pliable dough․
Using a sturdy spoon or a stand mixer with a dough hook attachment, combine the ingredients․ Mix on low speed initially, gradually increasing to medium, until a cohesive dough forms․ Avoid overmixing, as this can result in tough rolls․ The dough should pull away from the sides of the bowl, but remain slightly tacky․
This initial mixing process is crucial for activating the yeast and developing the dough’s structure, setting the stage for a successful rise and a tender final product․
First Rise: Proofing the Yeast
Following the dough mixing stage, the crucial process of “proofing” the yeast begins․ Lightly grease a large bowl with butter or cooking spray․ Gently transfer the dough into the prepared bowl, turning to coat all sides with the grease – this prevents sticking during rising․
Cover the bowl loosely with plastic wrap or a clean kitchen towel․ Place it in a warm, draft-free location․ Ideal temperatures range between 75-85°F (24-29°C)․ Allow the dough to rise for approximately 60-90 minutes, or until it has doubled in size․
This first rise allows the yeast to ferment, producing carbon dioxide which creates air pockets, resulting in light and fluffy rolls․ A successful proofing is indicated by the dough’s increased volume and a slightly spongy texture․
Shaping the Dinner Rolls
Once the dough has doubled during the first rise, gently punch it down to release the air․ Turn the dough out onto a lightly floured surface․ Knead briefly – about a minute – to redistribute the yeast and develop some structure․
Divide the dough into 12 equal pieces․ A kitchen scale ensures uniformity for even baking․ Shape each piece into a smooth ball by tucking the edges underneath․ This creates a neat, rounded roll․
Place the shaped rolls into a greased 9×13 inch baking pan, leaving a little space between each roll to allow for further expansion during the second rise․ Alternatively, you can arrange them in a muffin tin for individual portions․

Second Rise: Final Proofing
After shaping the rolls, cover the baking pan or muffin tin loosely with plastic wrap or a clean kitchen towel․ This prevents the dough from drying out while allowing it to rise․ Place the covered rolls in a warm, draft-free location․
Allow the rolls to rise for approximately 30-45 minutes, or until they have nearly doubled in size․ The warmer the environment, the faster they will rise․ A slightly warm oven (turned off!) can provide an ideal proofing space․
Gently press a finger into one of the rolls; if the indentation slowly springs back, they are ready for baking․ Under-proofed rolls will be dense, while over-proofed rolls may collapse during baking․
Baking Temperature and Time
Generally, Pillsbury Hot Roll Mix rolls are best baked at 350°F (175°C)․ This temperature ensures even cooking, resulting in golden-brown exteriors and fluffy interiors․ However, oven variations exist, so monitoring is crucial․
Baking time typically ranges from 12 to 18 minutes for dinner rolls, and slightly longer – around 15 to 20 minutes – for cinnamon rolls, especially if baking in a muffin tin․ Begin checking for doneness around the 12-minute mark․
Rolls are done when they are golden brown and sound hollow when tapped lightly on the bottom․ An internal temperature of 190-200°F (88-93°C) confirms they are fully baked․ Adjust baking time as needed based on your oven’s performance․
Cinnamon Roll Variations
Pillsbury Hot Roll Mix lends itself beautifully to creative cinnamon roll adaptations! Beyond the classic, explore delightful variations to suit any palate․ Consider adding a cream cheese frosting swirl for extra richness, or a drizzle of maple glaze for a warm, comforting touch․
For a nutty twist, incorporate chopped pecans or walnuts into the cinnamon-sugar filling․ Fruit additions, like raisins or dried cranberries, provide a chewy texture and burst of flavor․ Some bakers even enjoy a light lemon zest in the dough for brightness․
Experiment with different spices – a pinch of nutmeg or cardamom can elevate the cinnamon flavor․ Don’t hesitate to get creative and personalize your cinnamon rolls!
Adapting the Mix for Cinnamon Rolls
Pillsbury Hot Roll Mix is remarkably adaptable for crafting delectable cinnamon rolls․ While designed for dinner rolls, a few adjustments unlock its potential for sweet treats․ The key lies in enriching the dough with additional sugar – typically 1/4 to 1/2 cup – to achieve the desired sweetness․
Incorporating melted butter, around 1/4 cup, into the dough enhances tenderness and flavor․ A touch of vanilla extract, about a teaspoon, complements the cinnamon beautifully․ Remember to adjust liquid slightly if needed, aiming for a soft, pliable dough․
The mix’s inherent yeast activity ensures a good rise, crucial for fluffy cinnamon rolls․ Following the basic dough preparation, proceed directly to creating the cinnamon-sugar filling and rolling technique․
Cinnamon-Sugar Filling Recipe
A generous and flavorful cinnamon-sugar filling is essential for exceptional cinnamon rolls made with Pillsbury Hot Roll Mix․ Begin with 1/2 cup of softened butter, spread evenly over the rolled-out dough․ This creates a luscious base for the sweet mixture․

Next, combine 3/4 cup granulated sugar with 2-3 tablespoons of ground cinnamon – adjust cinnamon to your preference․ For an extra layer of flavor, consider adding a pinch of nutmeg or allspice․ Sprinkle this mixture generously and uniformly over the buttered dough․
Some bakers enjoy adding chopped pecans or raisins to the filling for added texture and taste․ Ensure even distribution for consistent flavor in every bite․ A final drizzle of melted butter over the cinnamon-sugar mixture before rolling enhances richness․
Rolling and Cutting Cinnamon Rolls
After preparing the cinnamon-sugar filling, gently roll the dough into a tight log, starting from one of the long edges․ Apply even pressure to ensure a consistent roll, preventing air pockets․ A firm, even roll is crucial for uniform cinnamon roll size and shape․
Once rolled, use a sharp, non-serrated knife or unflavored dental floss to cut the log into approximately 1-inch thick slices․ Floss creates cleaner cuts, minimizing dough distortion․ Place the cut rolls, swirl-side up, in a greased 9×13 inch baking pan or a muffin tin․
Spacing the rolls slightly apart allows for expansion during the second rise and prevents them from sticking together․ Cover the pan loosely with plastic wrap and proceed to the final proofing stage before baking for perfectly formed, delectable cinnamon rolls․
Baking Cinnamon Rolls
Preheat your oven to 350°F (175°C)․ This temperature ensures even baking and a golden-brown exterior․ Place the prepared cinnamon rolls in the preheated oven and bake for approximately 20-25 minutes, or until golden brown and cooked through․ Monitor closely to prevent overbaking․
A toothpick inserted into the center of a roll should come out clean, indicating it’s fully baked․ If the tops are browning too quickly, tent the pan loosely with aluminum foil during the last few minutes of baking․
Once baked, remove the cinnamon rolls from the oven and let them cool slightly before frosting․ A warm glaze complements the soft, fluffy texture perfectly․ Enjoy these delightful homemade treats with a cup of coffee or a glass of milk!
Flavor Variations & Add-Ins
Pillsbury Hot Roll Mix is incredibly adaptable! For Cheddar Filled Rolls, incorporate shredded cheddar cheese into the dough during the mixing stage, about 1 cup is a good starting point․ Alternatively, create Rhubarb Jam Filled Rolls by adding a spoonful of rhubarb jam to the center of each roll before the second rise․
Experiment with other fillings like cream cheese, apple pie filling, or even savory options like pesto and sun-dried tomatoes․ Add-ins like chopped nuts, chocolate chips, or dried fruits can also elevate your rolls․
Don’t be afraid to get creative! A sprinkle of cinnamon and sugar on top before baking adds a touch of sweetness, while a brush of melted butter enhances the golden-brown crust․
Cheddar Filled Rolls
Cheddar Filled Rolls are a savory delight, easily achieved with Pillsbury Hot Roll Mix․ Begin by preparing the dough according to the basic dinner roll instructions․ Once the dough is ready to be shaped, gently flatten each portion into a small circle․
Place approximately one tablespoon of shredded cheddar cheese in the center of each circle․ Carefully pinch the edges of the dough together to completely enclose the cheese, forming a sealed roll․ Ensure the seal is tight to prevent cheese from leaking during baking․
Proceed with the second rise and baking as directed․ The warm, cheesy center combined with the soft, buttery roll creates an irresistible treat, perfect as a side dish or snack․ Approximately 1 cup of cheddar is recommended․
Rhubarb Jam Filled Rolls
Rhubarb Jam Filled Rolls offer a unique and delightful twist using Pillsbury Hot Roll Mix․ Prepare the dough following the standard dinner roll recipe․ Once the dough is ready for shaping, flatten each portion into a small, manageable circle on a lightly floured surface․
Spoon approximately one tablespoon of your favorite rhubarb jam into the center of each flattened circle․ Gently bring the edges of the dough up and pinch them together securely, completely sealing the jam inside․ A tight seal is crucial to prevent leakage during baking․
Continue with the second rise and baking instructions as outlined in the basic recipe․ The sweet-tart rhubarb filling complements the soft, buttery roll beautifully, creating a memorable treat․ Approximately ¾ cup of jam is recommended․
Adjusting for Oven Differences
Oven temperature variations significantly impact baking results with Pillsbury Hot Roll Mix․ Most recipes recommend 350°F (175°C), but individual ovens can differ․ If your oven consistently runs hot, reduce the temperature by 25°F and monitor closely․
Conversely, if your oven runs cold, increase the temperature by 25°F․ Regularly check the rolls for doneness, looking for a golden-brown color and a firm, yet soft, texture․ An oven thermometer is a valuable tool for accurate temperature readings․
Overbaked rolls will be dry and hard, while underbaked rolls may be pale and doughy․ Adjust baking time accordingly, starting with the recommended duration and adding or subtracting a few minutes as needed․ Careful observation is key to achieving perfectly baked rolls․
Troubleshooting Common Issues
Baking with Pillsbury Hot Roll Mix is generally straightforward, but occasional issues can arise․ Overcooked rolls often result from excessively high temperatures or prolonged baking time, leading to a dry, hard texture․ Reduce heat or shorten baking duration to prevent this․
Underbaked rolls appear pale and doughy; extend baking time and ensure the oven reaches the correct temperature․ Dense rolls can occur from overmixing the dough or insufficient yeast activation․ Mix gently and verify yeast freshness․
If the dough doesn’t rise adequately during proofing, ensure the environment is warm and draft-free․ A slightly warmed oven (turned off!) can provide ideal conditions․ Remember, consistent monitoring and minor adjustments are crucial for successful results!
Overcooked Rolls
Overcooked rolls, unfortunately, are a common mishap when baking with Pillsbury Hot Roll Mix, often stemming from an oven running hotter than indicated or leaving the rolls in for too long․ The telltale sign is a dark, hard exterior and a potentially dry, crumbly interior․
If you suspect overcooking, immediately reduce the baking time in future batches․ A lower oven temperature – perhaps 25 degrees Fahrenheit less – can also help․ Checking for doneness a few minutes before the recommended time is always wise․
While slightly overcooked rolls aren’t ideal, they aren’t ruined! Brushing the tops with melted butter immediately after removing them from the oven can help restore some moisture and improve the texture․ Prevention, however, is key!
Underbaked Rolls
Underbaked rolls present as pale, doughy, and potentially sticky to the touch․ This often occurs when the oven temperature is too low, or the baking time is insufficient․ A slightly wobbly center is a key indicator that more baking is needed․
If you encounter underbaked rolls, immediately return them to the oven for an additional 5-10 minutes, checking frequently․ Ensure your oven is properly preheated to 350°F (175°C) before starting․ Using an oven thermometer can confirm accurate temperature․
Remember, carryover baking will continue for a short period after removal from the oven․ However, significantly underbaked rolls may require a longer return trip to ensure a fully cooked, enjoyable result․ Don’t hesitate to check with a toothpick!
Dense Rolls
Dense rolls typically result from overmixing the dough, which develops too much gluten, or insufficient yeast activity․ This leads to a compact, rather than light and airy, texture․ Proper proofing is crucial to avoid this outcome․
When mixing the dough, follow the instructions carefully, avoiding excessive agitation․ Ensure your yeast is fresh and properly activated during the first rise․ A warm, draft-free environment is essential for optimal proofing․
If your rolls are consistently dense, consider using slightly warmer liquid when activating the yeast․ Avoid adding too much flour during kneading, as this can also contribute to a dense texture․ Gentle handling throughout the process is key to achieving fluffy, tender rolls․
Storage and Reheating
Storing leftover rolls properly maintains their freshness and flavor․ Allow the rolls to cool completely before storing them in an airtight container at room temperature for up to two days, or in the refrigerator for up to a week․ For longer storage, freezing is recommended․
To freeze, wrap the rolls individually or in small batches to prevent sticking․ They can be stored in the freezer for up to two months․ When ready to enjoy, several reheating options are available․
For a fresh-from-the-oven experience, wrap rolls in foil and reheat in a 350°F (175°C) oven for 10-15 minutes․ Alternatively, microwave for 10-20 seconds, or toast lightly for a crispy exterior․ A splash of water during reheating helps restore moisture․
Storing Leftover Rolls
Proper storage is key to enjoying Pillsbury Hot Roll Mix creations even after the initial baking․ To maintain optimal freshness, allow the rolls to cool completely before transferring them to an airtight container․ At room temperature, they’ll stay palatable for up to two days, but refrigeration extends this to approximately one week․

For extended preservation, freezing is an excellent option․ Individually wrap each roll, or group them in small, manageable portions, using plastic wrap or freezer bags․ This prevents sticking and freezer burn․ Properly frozen rolls can be stored for up to two months, retaining much of their original quality․
Remember to label the container with the date for easy tracking․ When you’re ready to indulge, simply thaw and reheat using your preferred method – oven, microwave, or toaster!
Reheating Options
Reviving leftover Pillsbury Hot Roll Mix rolls is surprisingly simple, offering several methods to restore their warm, fluffy texture․ For oven reheating, preheat to 350°F (175°C) and wrap the rolls loosely in foil․ Bake for 5-10 minutes, or until heated through․ This method best replicates the freshly baked experience․
The microwave provides a quicker solution․ Place a damp paper towel over the rolls and microwave in 10-15 second intervals, checking for warmth after each interval, to avoid becoming rubbery․ A toaster or toaster oven also works well, offering a slightly crisp exterior․
For frozen rolls, thawing before reheating is recommended, though they can be reheated directly from frozen – simply increase the baking or microwaving time accordingly․ Enjoy!