lego snowman instructions
Embark on a frosty adventure! Discover the joy of constructing a charming LEGO snowman, blending creativity with classic winter fun.
LEGO building offers endless possibilities, and recreating a snowman is a delightful project for builders of all ages and skill levels.
What is a LEGO Snowman?
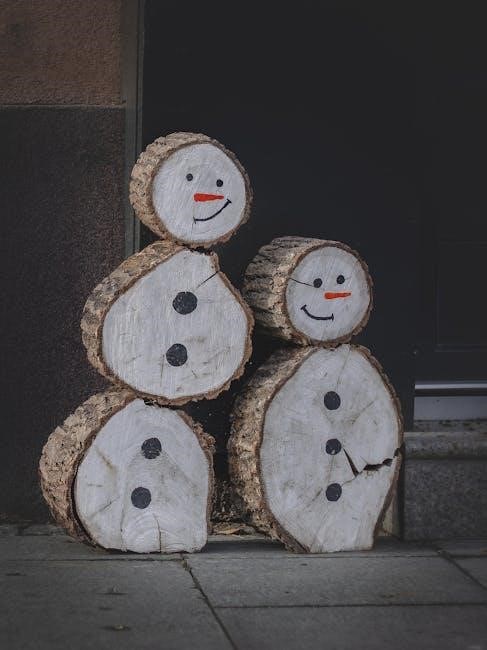
A LEGO snowman is a creative interpretation of the traditional winter figure, built entirely from LEGO bricks. Unlike a real snowman, which is temporary and melts with warmer temperatures, a LEGO snowman is a durable and lasting creation.
It’s a fantastic way to bring the magic of winter indoors, regardless of the weather outside. Builders utilize various white LEGO bricks – slopes, curves, and standard blocks – to mimic the snowball shape. Accessories like carrot noses, hats, and button details are added to complete the iconic look.
The beauty lies in the customization; each LEGO snowman can be unique, reflecting the builder’s imagination and available brick collection. It’s a playful and engaging project!
Why Build a LEGO Snowman?
Building a LEGO snowman offers a multitude of benefits! It’s a fantastic creative outlet, encouraging problem-solving skills and spatial reasoning as you figure out how to connect the bricks. It’s a fun, screen-free activity for individuals or families, fostering collaboration and shared enjoyment.
LEGO building provides a sense of accomplishment upon completion, and a LEGO snowman serves as a charming winter decoration. It’s a wonderful way to express your personality and imagination, customizing the snowman with unique accessories and details.
Plus, unlike a real snowman, it won’t melt, providing lasting winter cheer!

Gathering Your LEGO Bricks
Prepare for building! Collect a variety of white LEGO bricks, alongside accent colors for accessories like a carrot nose and festive buttons.
A sturdy baseplate is essential for a stable, display-ready LEGO snowman creation.
Essential White Bricks
Foundation of Frost: Building a LEGO snowman fundamentally relies on a plentiful supply of white bricks. Prioritize a diverse range of sizes – from 2×2 plates to larger slopes and curved pieces – to achieve the rounded form characteristic of a snowman.

Consider the brick types as well. Standard bricks are great for core structure, while smoother tiles can create a polished exterior. Don’t underestimate the value of wedge plates for shaping the snowman’s curves. Having a good mix allows for flexibility during construction and helps avoid a blocky appearance.
Transparent white bricks, though not strictly essential, can add a subtle frosty texture. Ensure you have enough to build each snowball section, progressively decreasing in size as you build upwards towards the head.
Accessory Bricks: Carrot Nose, Hat, and Buttons
Bringing the Snowman to Life: Beyond white bricks, specific accessories are crucial for a recognizable snowman. An orange cone piece perfectly serves as the classic carrot nose – a 1×1 cone is ideal. For the hat, explore black or dark blue cylindrical bricks, or even creatively stack smaller pieces to form a top hat.
Round 1×1 plates in black or dark colors function wonderfully as buttons, adding charming detail to the snowman’s midsection. Consider using different sized round plates for visual interest.
Don’t be afraid to improvise! A small twig can be replicated with a brown Technic axle, and a scarf can be fashioned from a strip of fabric or even a flexible LEGO chain.
Base Plate Selection
Foundation for Frosty Fun: Choosing the right base plate sets the stage for your LEGO snowman. A classic choice is a white baseplate, mimicking a snowy landscape. However, don’t limit yourself! Light bluish gray or even a pale green baseplate can represent a winter field or a slightly melted snow patch.
Consider the size of your planned snowman. A larger snowman requires a larger baseplate – a 16×16 stud plate is a good starting point. Smaller snowmen can comfortably sit on an 8×8 or even a 6×6 plate.
Think about incorporating a scene! A blue baseplate could represent a frozen pond, adding context to your creation.

Step-by-Step LEGO Snowman Instructions ⸺ Body
Building the core! Begin constructing the snowman’s body with layered spheres of white LEGO bricks, gradually decreasing in size for a classic shape.
Building the First Snowball Layer
Foundation first! To initiate your LEGO snowman’s construction, focus on the base – the largest snowball. Begin by creating a circular foundation using larger, primarily white LEGO bricks. Consider 2×2, 2×4, and even larger plate pieces to establish a stable and broad base.
Don’t aim for perfect smoothness initially; a slightly textured surface adds character. Gradually build upwards, layering bricks in a somewhat rounded fashion. Interlock the bricks to ensure structural integrity. Think about offsetting each layer slightly to create a more natural, spherical form.
This first layer should be significantly larger than the subsequent layers, representing the snowman’s substantial lower body. Continue adding bricks until you achieve the desired diameter for the base snowball.

Constructing the Middle Snowball Layer
Shrinking the sphere! Now, build the middle section of your snowman, which will be smaller than the base; Utilize a mix of white LEGO bricks, again favoring 2×2 and 2×4 pieces, but potentially incorporating slightly smaller sizes. Begin constructing a circular layer directly on top of the completed base.
This layer requires more attention to shaping. Gradually reduce the diameter with each successive layer of bricks, working towards a more pronounced spherical form. Ensure a secure connection between this middle layer and the base, using interlocking techniques.
The middle snowball should be noticeably smaller than the first, creating the classic snowman proportions. Continue building upwards, refining the shape as you go, until you reach the desired size for this section.
Creating the Head Snowball Layer
The crowning glory! Now for the snowman’s head – the smallest snowball yet! Continue the diminishing size trend, using even smaller LEGO bricks like 1×1, 1×2, and occasionally 2×2 pieces. Carefully position this layer directly atop the middle section, ensuring a stable connection.
Focus on achieving a perfectly round shape for the head. This might require more intricate brick placement and potentially some trial and error. Consider using curved LEGO pieces if available to enhance the spherical form.
The head should be significantly smaller than the body layers, completing the iconic snowman silhouette. Securely attach all bricks, preparing for the addition of facial features and accessories in the next steps.

Adding Facial Features and Accessories
Bring your snowman to life! Now it’s time for personality – attach a carrot nose, expressive eyes, and a cheerful mouth using LEGO pieces.
These details transform a simple build into a recognizable and endearing winter friend.
Attaching the Carrot Nose
The iconic carrot nose is essential! Select a bright orange LEGO cone or a combination of angled bricks to replicate the classic snowman feature. Consider the size of your snowman’s head when choosing the appropriate piece; a larger head requires a proportionally larger “carrot.”
Securely attach the nose to the center of the face, ensuring it’s firmly connected to prevent it from falling off during play or display. Experiment with slight angles to give your snowman a unique and playful expression. If a perfect cone isn’t available, creatively stack orange bricks to achieve a similar shape. A well-placed carrot nose instantly adds character and charm to your LEGO snowman!
Don’t be afraid to try different shades of orange for a more realistic or stylized look.
Placing the Eyes
Bring your snowman to life with expressive eyes! Utilize round 1×1 plates or tiles in black or dark bluish grey to create the eyes. Symmetry is key for a friendly appearance, so ensure both eyes are positioned at the same height and distance from the nose.
Experiment with different eye placements – closer together for a cute look, or further apart for a more surprised expression. Small transparent round plates can also add a sparkling effect. Securely attach the eyes to the head, pressing firmly to prevent them from dislodging. Consider using slopes to angle the eyes slightly, adding depth and personality.
Don’t hesitate to get creative with eye color or shape for a unique snowman!
Adding the Mouth
Give your snowman a cheerful grin! A classic snowman mouth is easily achieved using a curved slope piece, ideally in black or dark bluish grey. Alternatively, arrange several small 1×1 plates or tiles to form a smiling arc. Ensure the mouth is positioned below the nose and centered on the face for a balanced look.
Experiment with different mouth shapes – a wide, open smile or a smaller, more subtle curve. Consider using a red 1×1 tile as a playful touch. Securely attach the mouth pieces, pressing firmly to prevent them from falling off during play. A slightly angled mouth can add character!
Let your creativity shine and craft a unique expression!
Completing the Snowman’s Look
Final touches bring your LEGO snowman to life! Add a hat, buttons, and arms to finalize the build, creating a festive winter friend.
Putting on the Hat
Selecting the Perfect Hat: The hat is a crucial element, defining your snowman’s personality! Consider using a conical brick, a sloped brick combination, or even creatively stacked plates to achieve the desired shape. Black, dark blue, or even festive red colors work wonderfully.
Secure Attachment: Carefully position the hat atop the snowman’s head. Ensure a snug fit by utilizing smaller plates or tiles underneath to provide a stable base. Experiment with different attachment points to prevent the hat from easily falling off during playful handling.
Adding Details: Enhance the hat with additional LEGO elements! A small plate or tile can simulate a hatband, while a miniature flower or holly sprig adds a touch of seasonal charm. Let your imagination run wild and personalize the hat to match your snowman’s unique style!
Adding Buttons
Choosing Button Bricks: Select round plates or tiles in contrasting colors to represent the snowman’s buttons. Black, red, or even translucent colors can create a visually appealing effect. Varying the sizes of the buttons adds depth and interest to the design.
Strategic Placement: Arrange the buttons down the front of the snowman’s middle snowball layer. Maintain a consistent spacing between each button for a balanced look. Consider using an odd number of buttons for a more aesthetically pleasing arrangement.

Secure Attachment & Variations: Press the button bricks firmly onto the surface to ensure they stay in place. For a unique touch, experiment with different button shapes or even incorporate textured bricks to simulate a knitted sweater effect!
Creating Arms
Selecting Arm Pieces: Utilize LEGO bars, plates, or even Technic pieces to construct the snowman’s arms. Consider the desired length and pose – straight arms, bent arms, or arms reaching upwards all add personality.
Attachment Points: Carefully attach the arms to the sides of the middle snowball layer. Ensure a secure connection to prevent them from falling off during play or display. Using hinge bricks allows for posable arms!
Adding Details: Enhance the arms by adding small plates or tiles to represent gloves or mittens. Different colors can create a charming winter accessory look. Experiment with different arm lengths for a whimsical touch.

Advanced LEGO Snowman Techniques
Elevate your builds! Explore textured brickwork, translucent elements for frost, and expansive scenes to bring your LEGO snowman to life creatively.
Using Different Brick Shapes for Texture
Beyond smooth spheres, achieve a realistic snowy texture by incorporating varied LEGO brick shapes. Instead of solely relying on standard 2×2 or 2×4 bricks, experiment with slopes, curves, and even tiles. These additions break up the monotony and mimic the uneven surface of packed snow.
Consider using studded bricks for a rougher, more granular appearance, particularly on the lower layers of the snowman. Strategically placed slopes can suggest drifts or wind-blown snow. Small plates and tiles can smooth out certain areas, creating highlights and shadows that enhance the three-dimensional effect. Don’t be afraid to mix and match – the key is to create visual interest and avoid a perfectly uniform surface. This technique adds depth and realism to your LEGO snowman creation!
Incorporating Translucent Bricks for a Frosty Effect
Elevate your snowman’s chill factor by strategically integrating translucent LEGO bricks! These pieces mimic the way light passes through ice and snow, creating a captivating frosty appearance. Use translucent white or light blue bricks sparingly, perhaps within the core of the snowball layers, to suggest internal illumination.
Consider placing translucent plates or tiles on the surface to simulate glistening ice crystals. A few well-placed translucent studs can also add subtle sparkle. Avoid overusing them, as too much translucency can diminish the overall snowy aesthetic. The goal is to hint at the cold, icy nature of the snowman, not to make it entirely transparent. This subtle detail adds a magical touch!
Building a LEGO Snowman Scene
Transform your snowman from a solitary figure into a winter wonderland! Expand your creation by building a surrounding scene. Utilize a baseplate to represent a snowy landscape, adding LEGO trees – perhaps decorated with tiny translucent studs for ornaments. Include a cozy LEGO cottage in the background, complete with smoke billowing from the chimney.
Scatter small, dark blue bricks to simulate frozen puddles or icy patches. Consider adding minifigure characters enjoying winter activities like skating or sledding. A small LEGO fence can define a yard, and a lamppost can cast a warm glow. Let your imagination run wild, crafting a festive and immersive environment for your frosty friend!

Troubleshooting Common Building Issues
Encountering difficulties? Don’t worry! Common problems like instability, loose bricks, or brick shortages are easily solved with a little patience and creativity.
Snowman is Unstable
Is your LEGO snowman toppling over? This is a frequent issue, especially with larger builds! The core problem often lies in the connections between the snowball layers. Ensure each layer is firmly attached to the one below it, utilizing a variety of brick orientations for maximum stability.
Consider using Technic bricks or plates within the core of each snowball to create a stronger internal structure. A wider base plate also dramatically improves stability, providing a larger footprint. Avoid building too tall relative to the base width – a disproportionate snowman is more prone to collapse.
Finally, gently test the connections as you build; don’t wait until the entire snowman is complete to discover weak points. Reinforce any areas that feel wobbly!
Bricks Won’t Stay Connected
Frustrated by LEGO bricks that refuse to stick? Several factors can cause this. First, ensure you’re using compatible bricks – older, worn bricks may have clutch power issues. Check for dust or debris between the studs; a simple cleaning can work wonders!
Applying even pressure when connecting bricks is crucial. Avoid forcing them; a slight wiggle while pressing can help. If you’re building on an uneven surface, this can also affect connections. A stable, flat workspace is essential.
Finally, some brick combinations simply aren’t as secure as others. Experiment with different connection methods and consider reinforcing weaker areas with plates or tiles.
Running Out of Specific Bricks
Encountering a brick shortage mid-build? It’s a common LEGO challenge! First, thoroughly search your entire collection – bricks often hide in unexpected places. Consider temporarily disassembling a less critical section of your snowman to repurpose bricks.
If that fails, explore alternative color schemes. A slightly different colored hat or button might not detract from the overall look. Online LEGO marketplaces or BrickLink can be invaluable for sourcing specific parts, though this involves an additional cost.
Lastly, embrace creative substitution! Can a similar-sized brick fulfill the role, even if it’s not identical?